Firebase Image Notifications Android
Hello there, this is a very simple blog but a very important one as it solves a very common problem. Some time back I struggled a lot to find the guide about showing image notifications in android using firebase. There are many resources available but believe me, you will have to refer to many sources before actually being completely able to implement image notifications in android. So let’s start.
For implementing firebase image notifications in android you need to follow the following steps:
- Create a firebase project and implement firebase in your app
- Implement firebase cloud messaging service
- Parse received notification
- Create and show notification
Create a firebase project and implement firebase in your app
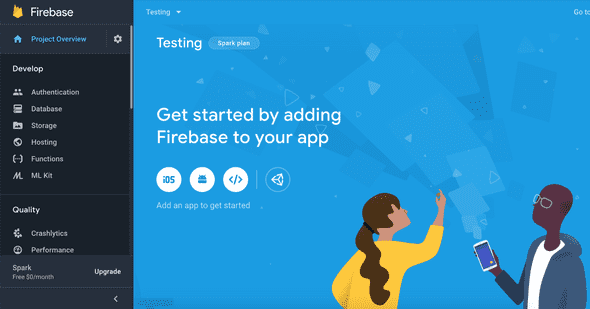
Go to firebase console and login with your credentials. On the dashboard, you will see an option to add a new project. Give a name to your project. On the next screen, select “Set up google analytics for my project” if you want analytics or you can also do it later. Click on “Create Project”. Your project will be created and you will see a screen like this:

Click on the white circular android button to set up this project for android. On the next screen that appears you will be asked for your app’s package name, app nickname(optional), and your debug signing certificate SHA-1 (optional). For finding the debug signing certificate SHA-1 you can use the following command:
keytool -list -v -keystore ~/.android/debug.keystore -alias androiddebugkey -storepass android -keypass android
After filling the fields click on register. On successful registration, you will be taken to step 2. Here you need to download the configuration file(google-services.json) needed by your app to access firebase. Click on “Download google-services.json” and save the downloaded file to your apps src/app/
The next step is self-explanatory. It will tell you what changes you need in your build.gradle file. Follow it and do the changes. Click next and on the next screen click “Continue to console”.
Implement firebase cloud messaging service
Add the following dependency to your app-level build.gradle file:
implementation 'com.google.firebase:firebase-messaging:20.0.0'
Register a custom Firebase messaging service in your manifest file:
<service
        android:name=".MyFirebaseMessagingService"
        android:exported="false">
<intent-filter>
        <action android:name="com.google.firebase.MESSAGING_EVENT"/>
</intent-filter>
</service>
Now add some default configurations for the incoming notifications. These configurations are used when you do not handle the configurations manually.
<!-- Default Notification Icon -->
<meta-data
       android:name="com.google.firebase.messaging.default_notification_icon"
       android:resource="@mipmap/ic_launcher" /><!-- Default notification color -->
<meta-data
       android:name="com.google.firebase.messaging.default_notification_color"
       android:resource="@color/colorAccent" /><!-- Default notification channel (required for Android 8.0 and above) -->
<meta-data
       android:name="com.google.firebase.messaging.default_notification_channel_id"
       android:value="@string/default_notification_channel_id" />
If you want to send a notification to a particular device then you will need to use the device’s FCM registration token. You need to get the FCM token and send it to your server or admin panel from which you are firing notifications. Use the following code in your main activity for initializing instanceId:
FirebaseInstanceId.getInstance().getInstanceId()
        .addOnCompleteListener(new OnCompleteListener<InstanceIdResult>() {
            @Override
            public void onComplete(@NonNull Task<InstanceIdResult> task) {
                    if (!task.isSuccessful()) {
                             Log.w(TAG, "getInstanceId failed", task.getException());
                             return;
                    }

                // Get new Instance ID token
                String token = task.getResult().getToken();

                // Log and toast
                String msg = getString(R.string.msg_token_fmt, token);
                Log.d(TAG, msg);
                Toast.makeText(MainActivity.this, msg, Toast.LENGTH_SHORT).show();
            }
 });
In your app folder create a java file named MyFirebaseMessagingService which extends FirebaseMessagingService. Add the following callback to receive the token:
@Override
public void onNewToken(String token) {
        Log.d(TAG, "Refreshed token: " + token);

       // If you want to send messages to this application instance or
       // manage this apps subscriptions on the server side, send the
       // Instance ID token to your app server.
       sendRegistrationToServer(token);
}
Parse received notification
Now, the notification part. Add the following callback to MyFirebaseMessagingService to receive notifications in your app:
@Override
public void onMessageReceived(RemoteMessage remoteMessage) {    // remoteMessage object contains all you need ;-)    String notificationTitle = remoteMessage.getNotification().getTitle();    String notificationContent = remoteMessage.getNotification.getMessage();    String imageUrl = remoteMessage.getData().get("image-url");    // lets create a notification with these data
    createNotification(notificationTitle, notificationContent, imageUrl);
}
Create and show notification
Note: Starting from Android 8.0 (Oreo) for showing notifications we need to create the notification channels. Without this, the notification will not be shown. See this link for more information.
Add the notification channel id and notification channel name to your string resources (strings.xml) file:
<resources>
           <string name="notification_channel_id">
            your.custom.id
            </string>
            <string name="notification_channel_name">
                    Your custom notification channel name
             </string>
</resources>
Now that we have everything we need let’s create and show a notification. Add the following method to the MyFirebaseMessagingService file:
public Bitmap getBitmapfromUrl(String imageUrl) {
    try {
         URL url = new URL(imageUrl);
         HttpURLConnection connection = (HttpURLConnection) url.openConnection();
         connection.setDoInput(true);
         connection.connect();
         InputStream input = connection.getInputStream();
         return BitmapFactory.decodeStream(input);
        }
    catch (Exception e) {
          Log.e("awesome","Error in getting notification image: " + e.getLocalizedMessage());
          return null;
        }
}
This method will fetch the image from the URL and return a bitmap which you can directly pass to your notification builder object.
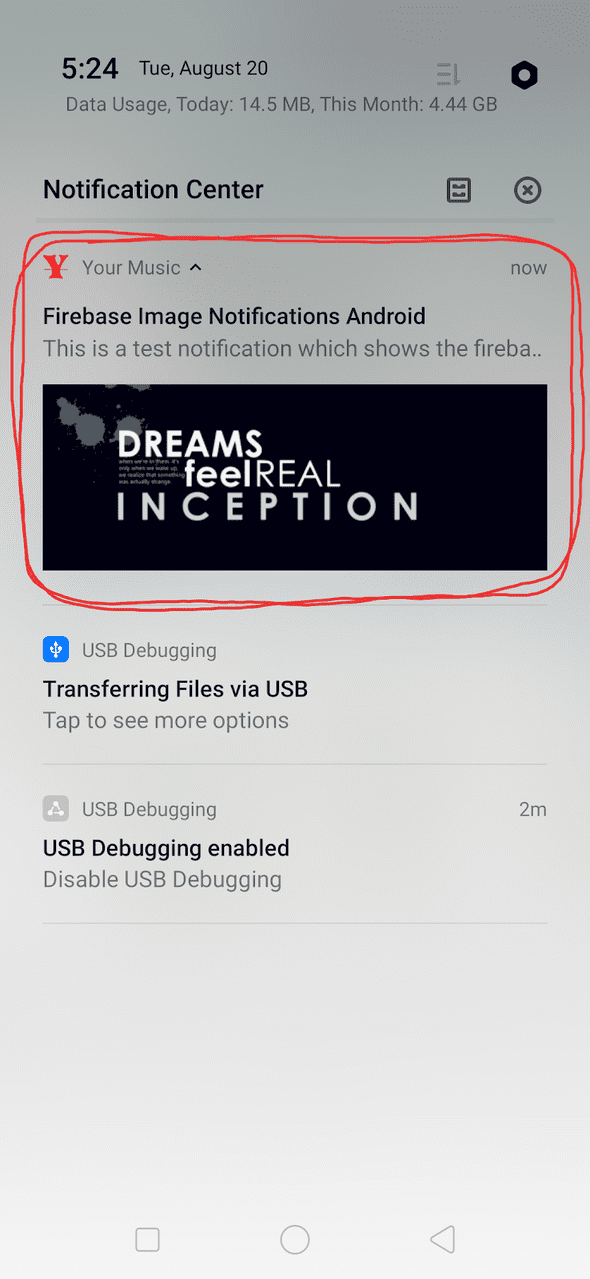
You are all done now. Go to your firebase console. Select your app and on the left navigation panel click on “Cloud Messaging” and create a notification. Enter the required fields, add the image URL and fire a notification. If you did everything as mentioned in this blog you would probably see something like this:
Verification of the successful implementation of firebase image notifications!
Ok, guys, that’s all. Hope you found this blog useful. Please consider giving me a clap which will motivate me to write more helpful blogs in the future. Thanks for reading.

